Table/Chair/Stand
Activity
Territories
Level
Hours
1Overview
Table/Chair/Stand
Table/Chair/Stand > Overview
Hours: 1
Prep-Time: 30 min.
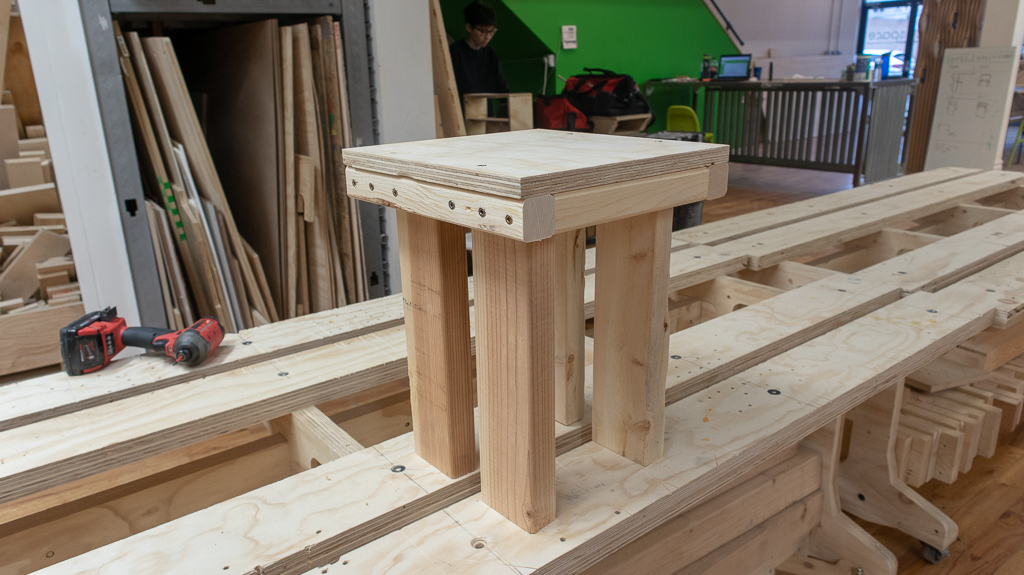
This activity is intended as a guide for teachers to learn a common simple woodshop project–a recipe of sorts–to make any kind of four-legged, flat-topped project like a table, stool, chair, or stand. There are infinite variations of this activity and chances are this “recipe” will be used by students in a number of other projects.
Throughout this activity we’ll be using the word “table” as a stand-in for whatever four-legged project you choose to make for yourself.
Standards
Table/Chair/Stand > Overview
- CCSS Math
- Geometry
- Draw, construct, and describe geometrical figures and describe the relationships between them.
- Reason with shapes and their attributes.
- Mathematical Practices
- Attend to precision.
- Use appropriate tools strategically.
- Measurement & Data
- Geometric measurement: understand concepts of angle and measure angles.
- Measure and estimate lengths in standard units.
- Solve problems involving measurement and estimation.
- NGSS
- Crosscutting Concept
- Structure and function
Gallery
Table/Chair/Stand > Overview

Paths
Table/Chair/Stand > Overview
Goals
Table/Chair/Stand > Overview
Goals
- Build a four-legged, flat-topped project.
- Learn the planning and strategy that goes into building a four-legged, flat-topped project.
Assessments
- Complete a plan and orthographic drawing for a unique four-legged flat-topped project.
- Construct a unique four-legged, flat-topped project.
- Describe your process for designing and constructing your four-legged, flat-topped project.
- What did you create (ex: chair, table, or stand)?
- Discuss any changes you made between the drawing and construction of it.
- Why did you make those changes?
Plan and Requirements
Plan and Requirements
Table/Chair/Stand > Plan and Requirements
Measurements – Determine the size of your table in all three dimensions.
If you aren’t sure how to start, we recommend measuring the length, width, and height of a nearby table or chair or similar.
It is often easier to choose measurements based on available materials. For instance, if there are already strips of ¾“ plywood that are cut down to 14” × 48”, don’t make your table 12” × 12” when it could be 14” × 14” (or 14” × 48” for that matter).
Structure – Determine how to make your table as sturdy as possible.
Use lumber for the structure. MDF won’t hold screws when under the weight of a human, and cutting plywood is a pain we try to endure as rarely as possible.
Don’t attach legs by screwing directly into endgrains. It makes clamping very hard and will encourage the wood to split.
Generally, you’ll want a rectangle of lumber to attach your legs to. Once the legs are attached to this frame, you can also attach the top into its side grains.
A combination of 2×2s and 2×4s should be your choice for legs and frame.
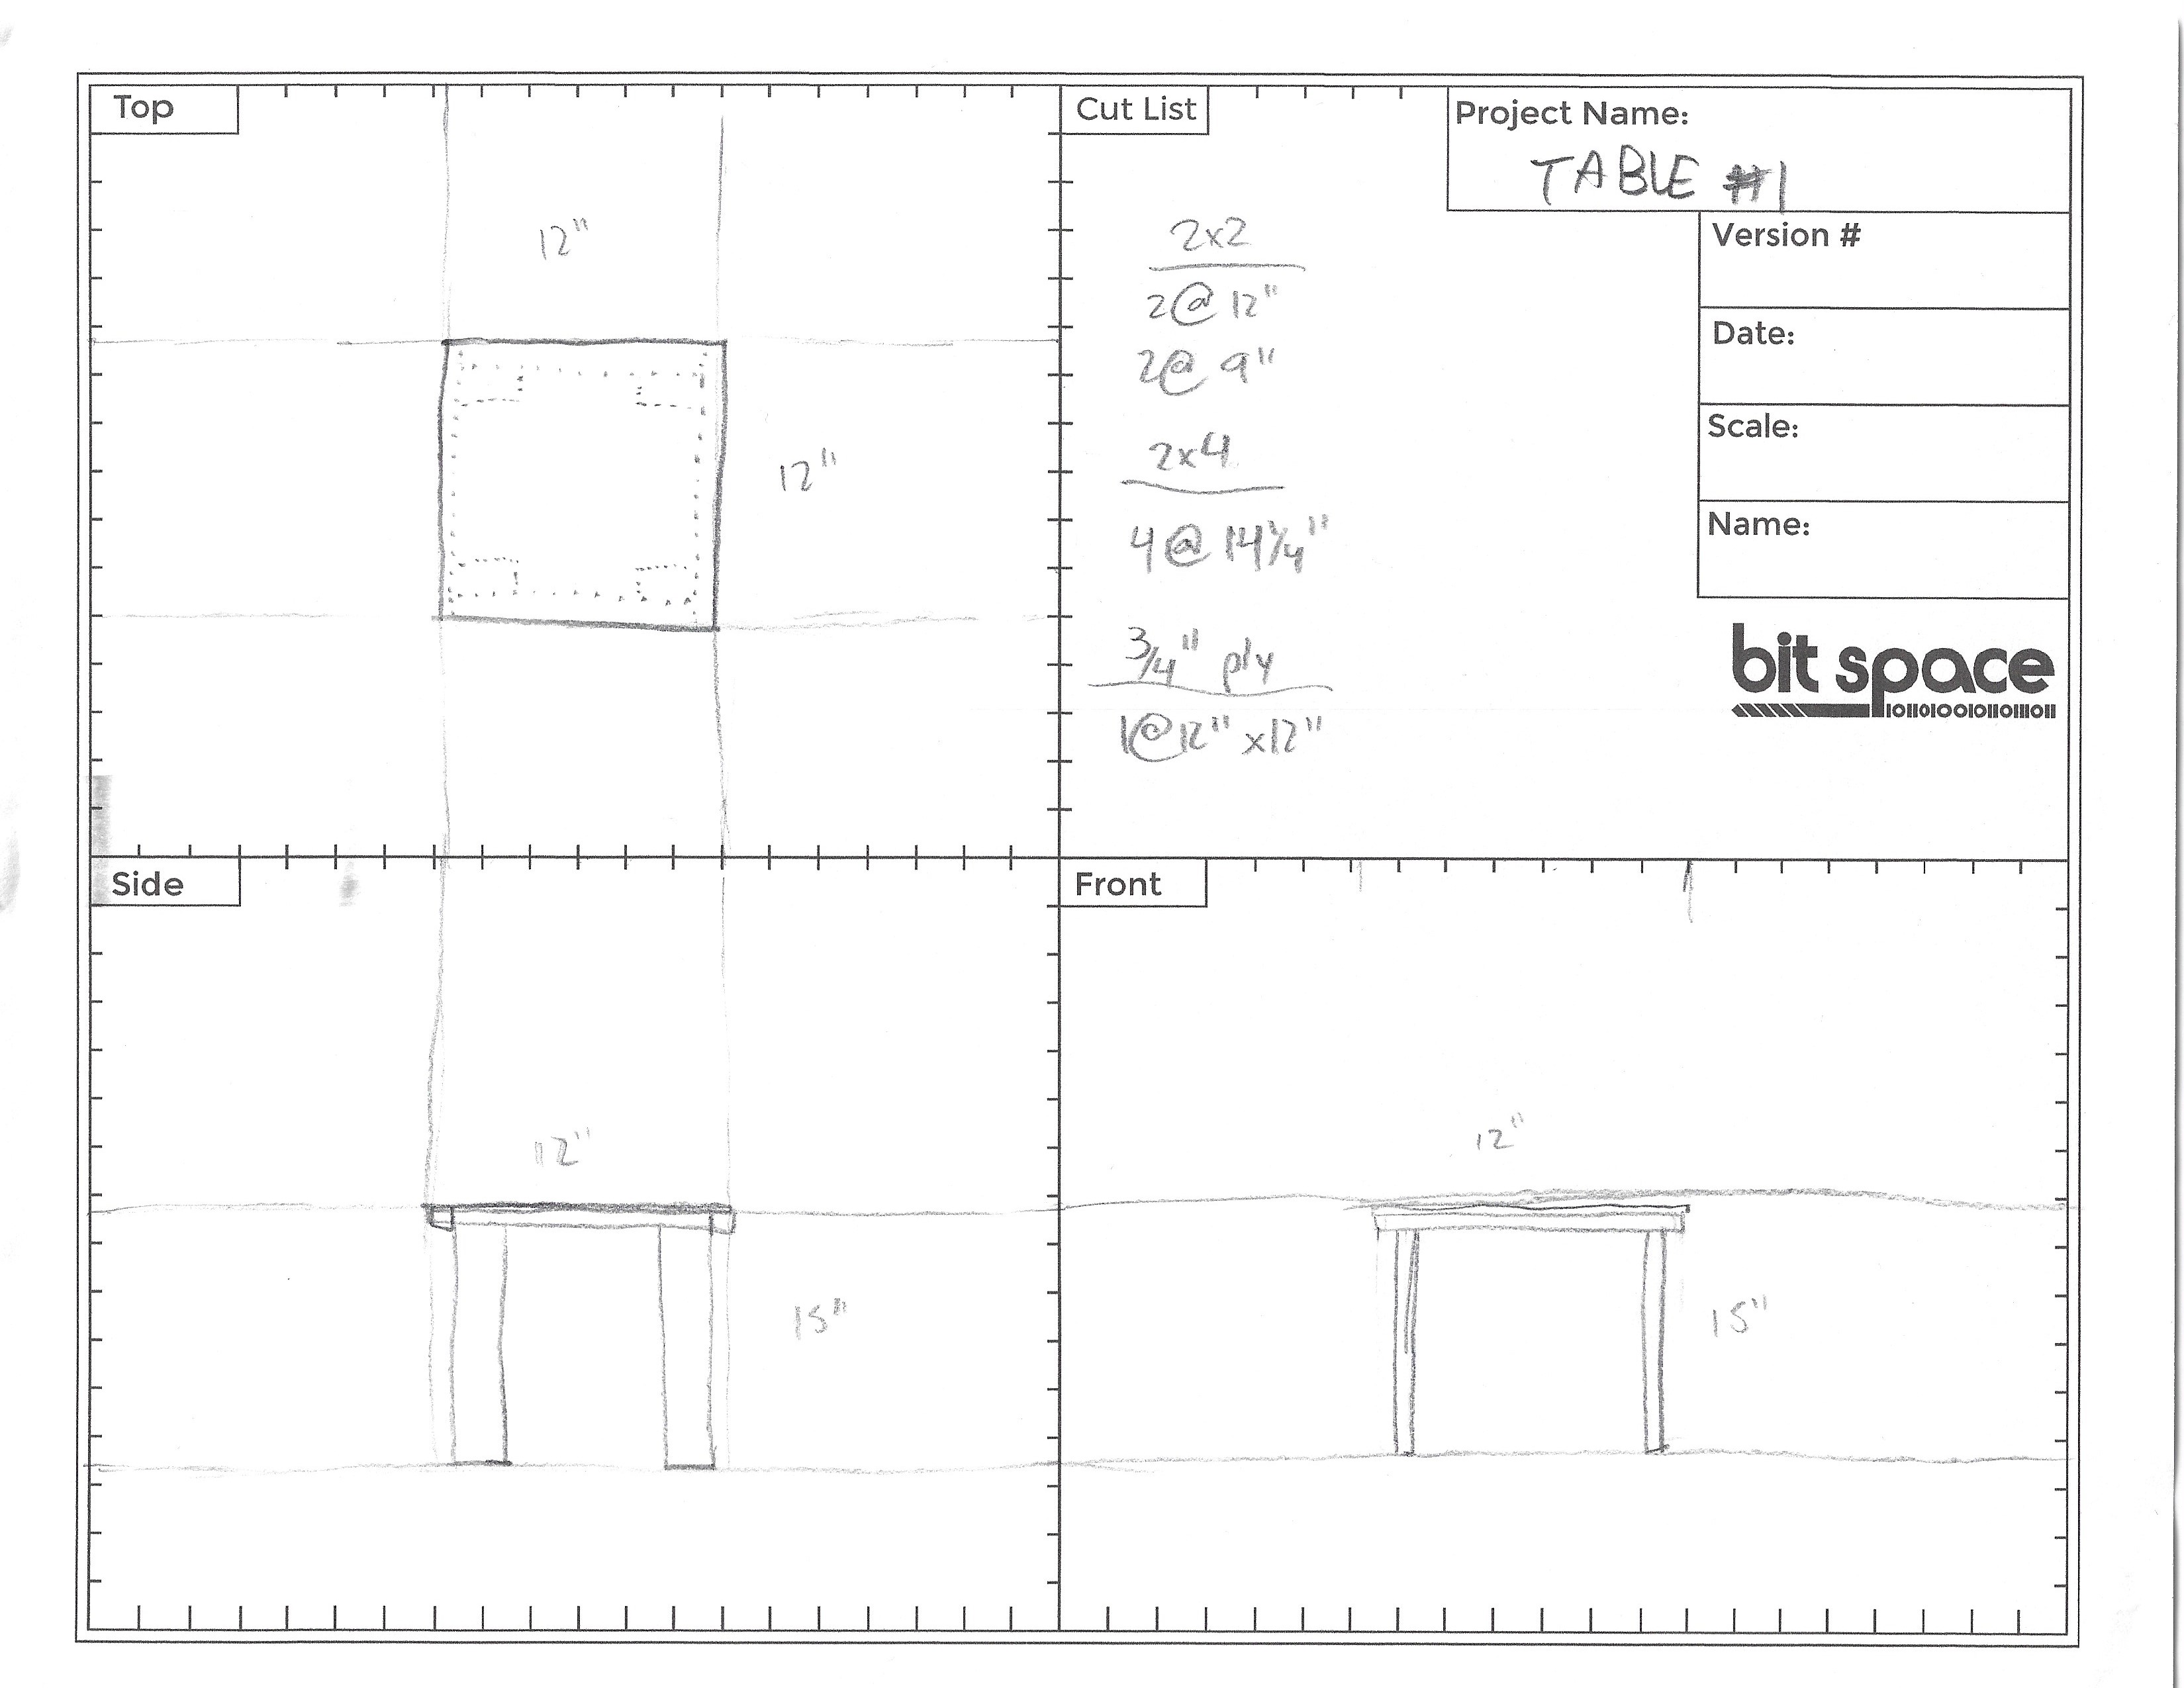
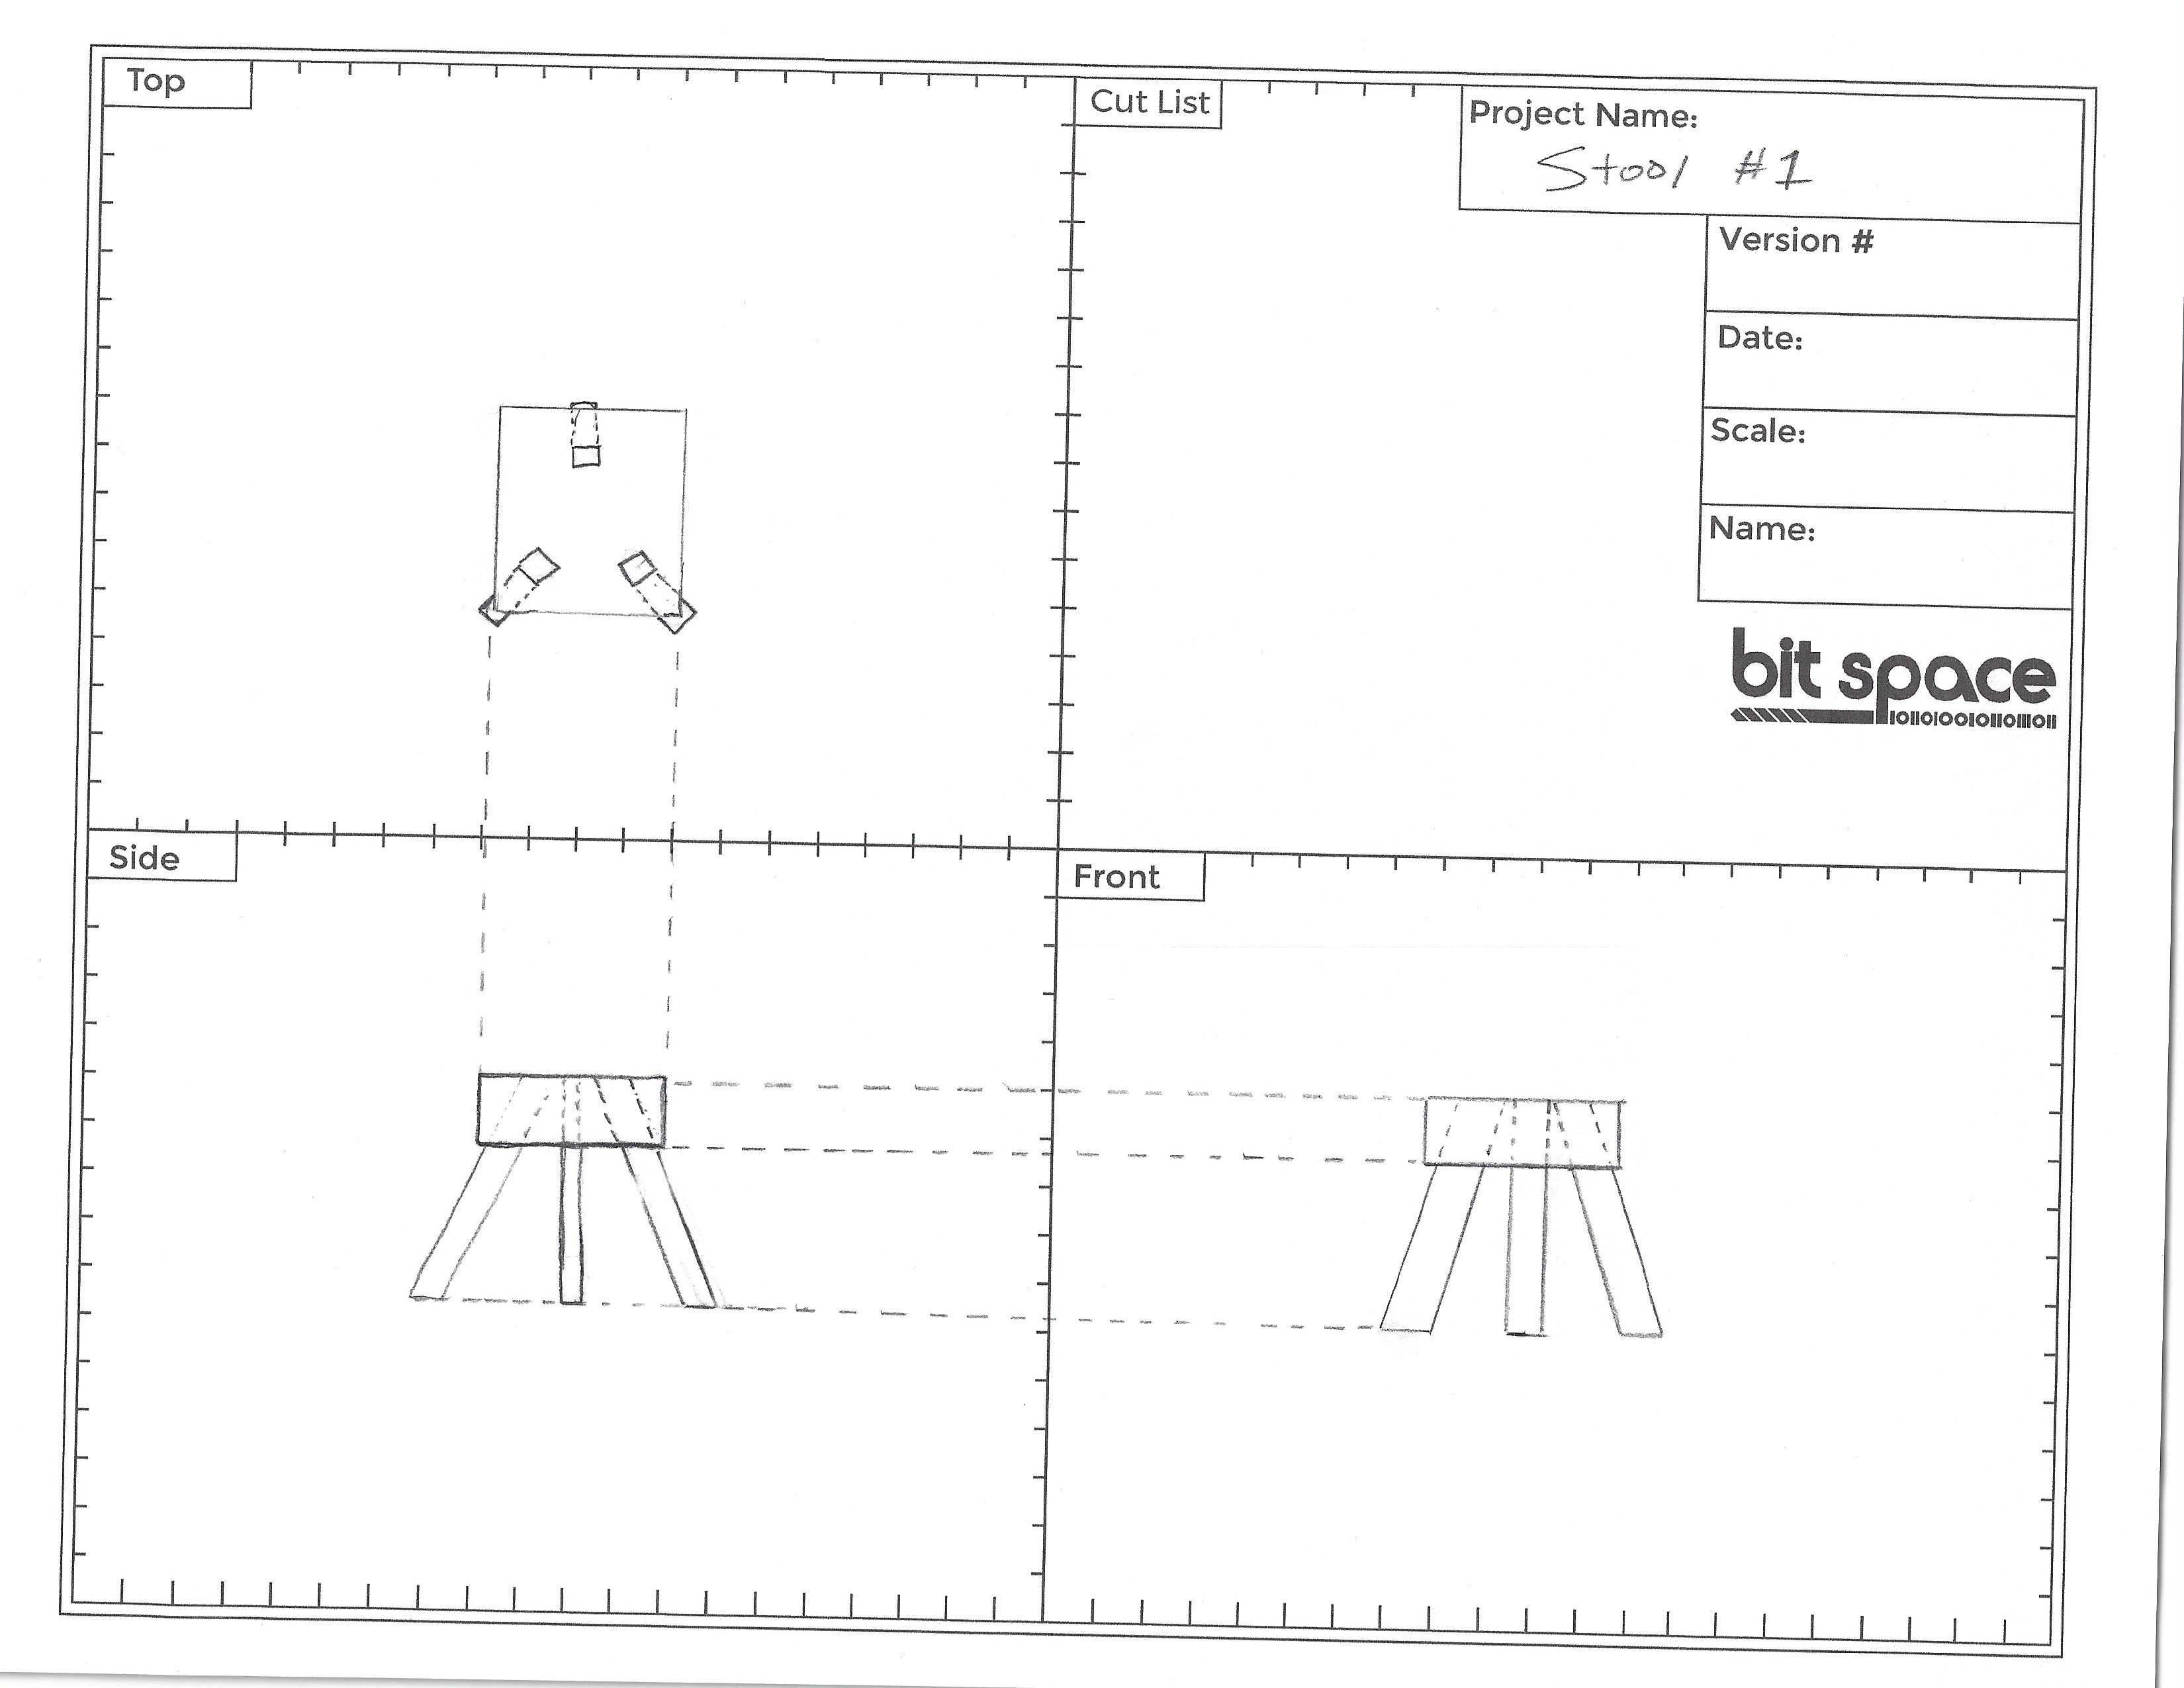
Drawings
Make an orthographic projection for your table. Make sure measurements are labeled and the structure of your lumber is visible.
Generate a cut list from your plan. If you are struggling at this phase, try reading up on the technique to create a construction plan.
Differentiated Instructions
Table/Chair/Stand > Plan and Requirements
Check students’ drawings and cut lists before sending them into the woodshop. An ounce of prevention is worth an hour of sawing the wrong piece of wood.
Cutting and Construction
Cutting and Construction
Table/Chair/Stand > Cutting and Construction
Follow your cut list and saw down appropriate pieces of lumber for the structure of your table.
When cutting large rectangles of plywood or MDF, hang your workpiece over the edge of your work table and cut vertically through it. See our activity on making boxes for further explanation.
Differentiated Instructions
Table/Chair/Stand > Cutting and Construction
We recommend pre-cutting sheet goods into strips of more useable sizes with a table saw. Generally, 10” wide, 12” wide, and/or 14” wide are good for these kinds of projects.
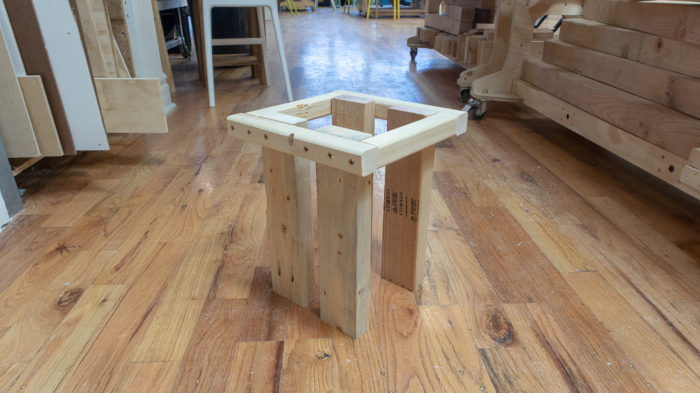
Once all pieces are cut, construct your frame first.
- For advanced woodshop workers, you may choose to use Pocket Hole Joinery instead for a cleaner-looking final product.
In general, due to the nature of these kinds of butt joints, you will want to set up your clamps to drill forward rather than down.
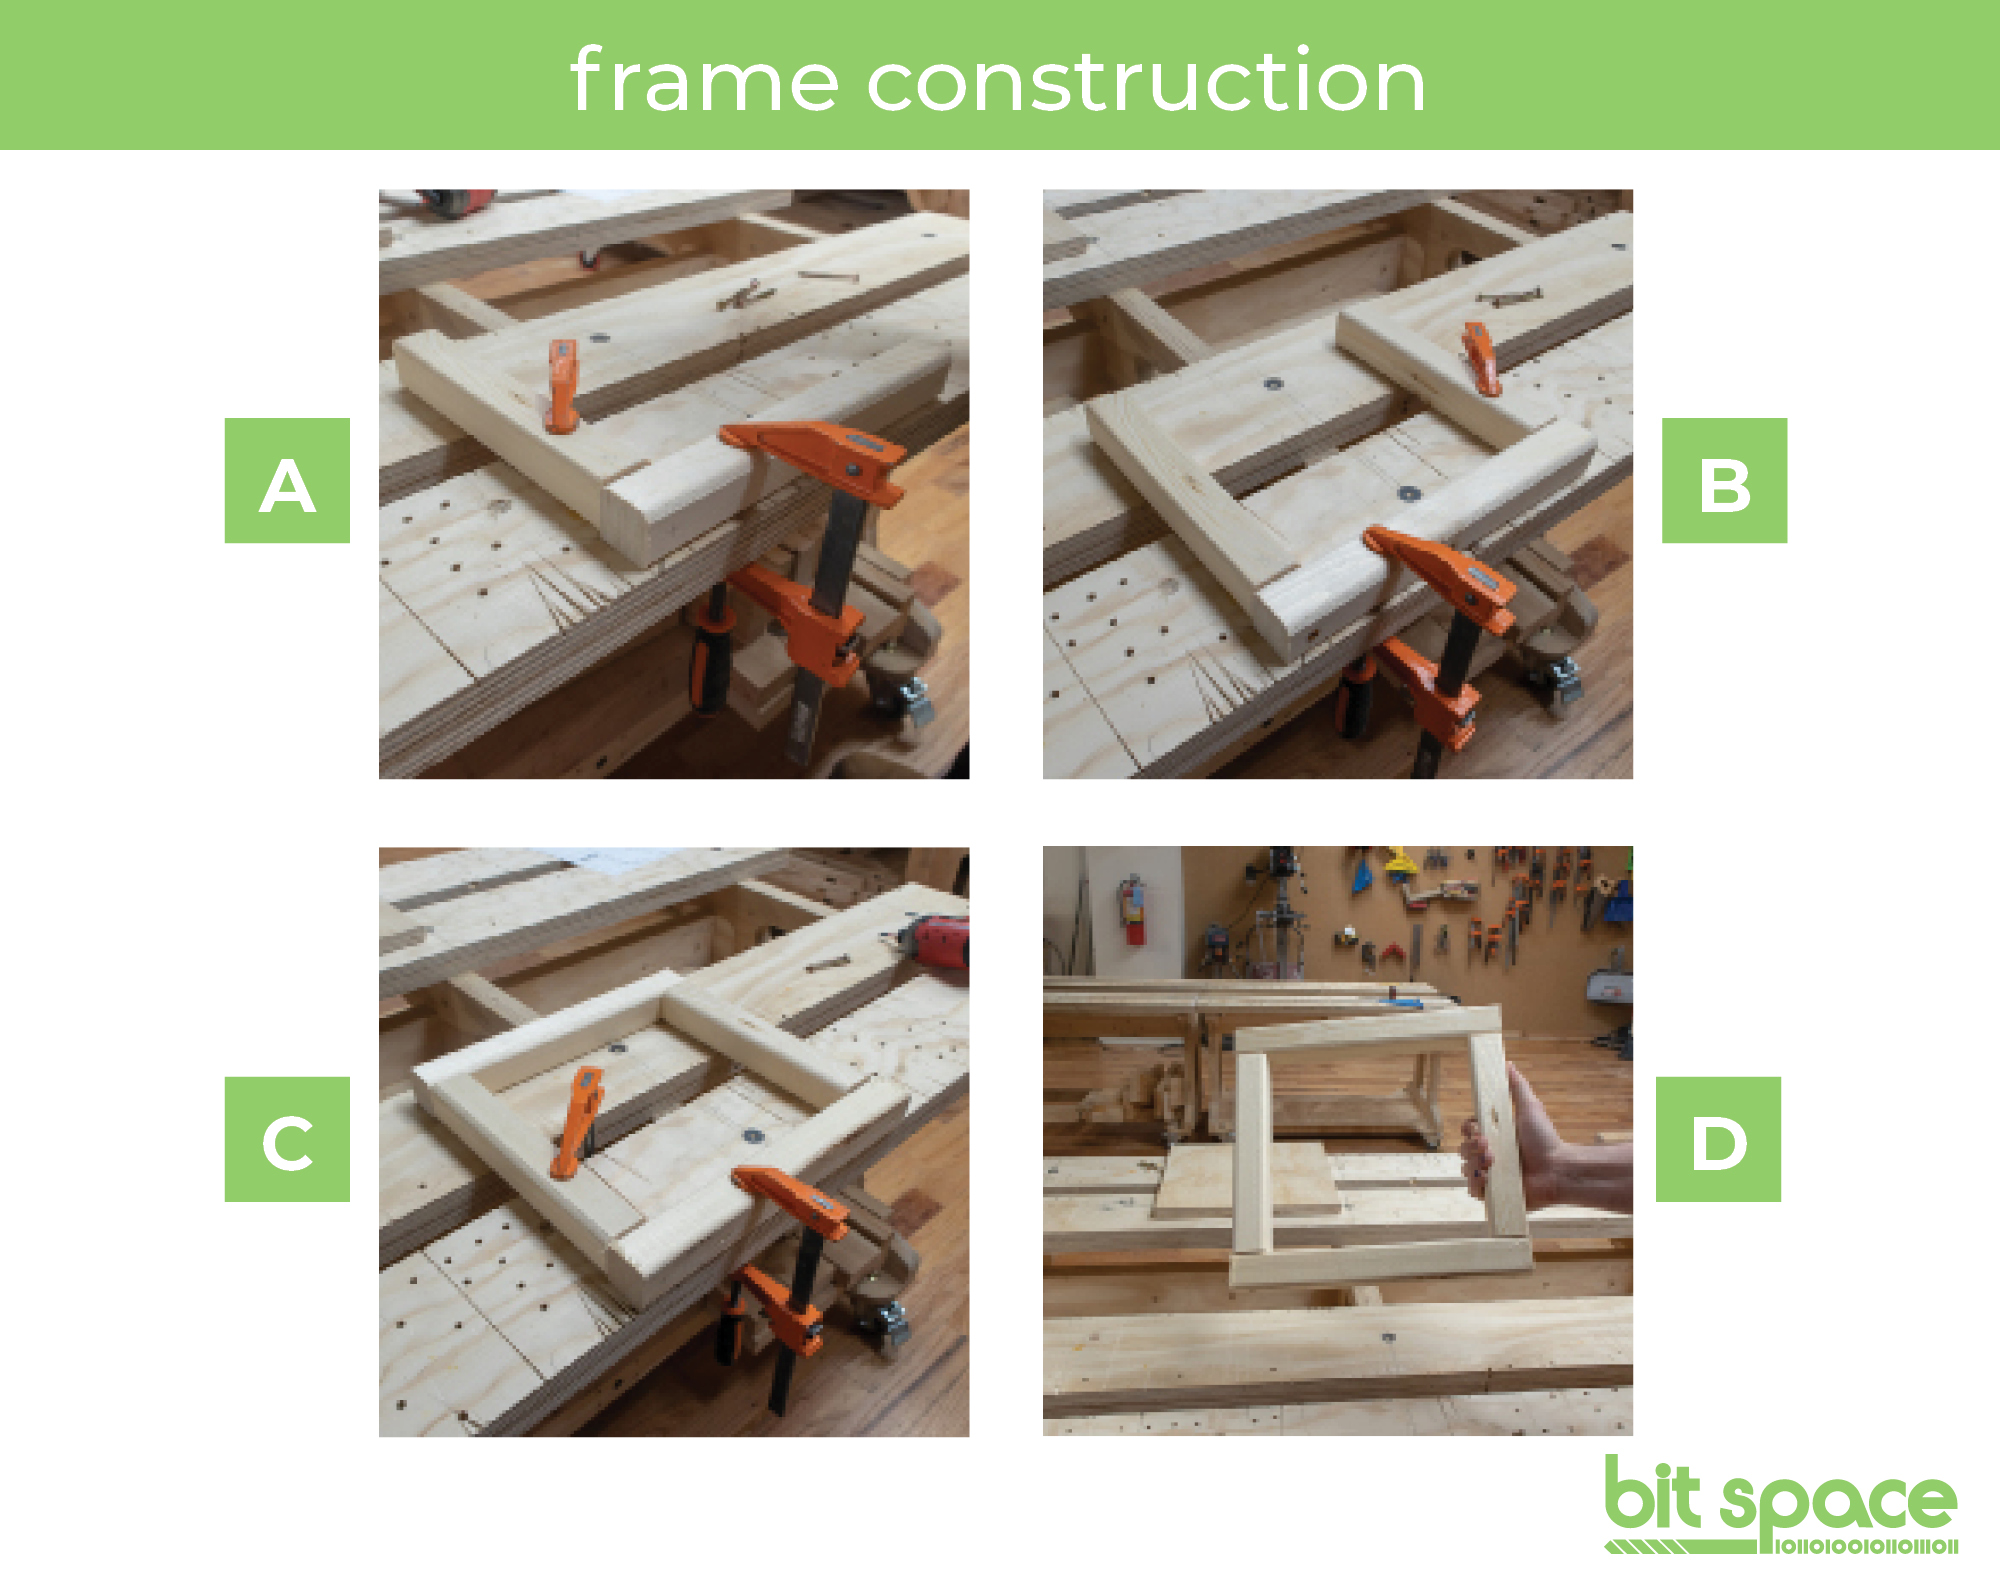
Put together the first two pieces in the shape of an L. Pre-drill and drive screws.
Add the opposite side of your L to make a U-shape. Pre-drill and drive screws.
Add the fourth side to complete your rectangular frame. Pre-drill and drive screws.
Add your legs “upside down.”
- Again, advanced users may adjust this step to employ Pocket Hole Joinery if they wish (and if they planned for it in their drawings).
Clamp your frame down onto the work table, and clamp your first leg into the appropriate corner. Pre-drill and drive screws.
Ideally, use two screws per leg to minimize the chance of them shifting or rotating.
Consider how exactly this will be arranged–it can be dangerous or damaging to your project if screws are driven into other screws. Generally, try to attach legs so that their screws are parallel to the screws in your frame.

Add the second leg. Then unclamp and rotate your frame.
Add the third and fourth leg.
Flip your structure upright. Clamp your flat top material onto the frame. Pre-drill and drive screws.
Again, make sure you aren’t driving screws into other screws. Typically this will mean attaching along the sides of the frame rather than the corners.
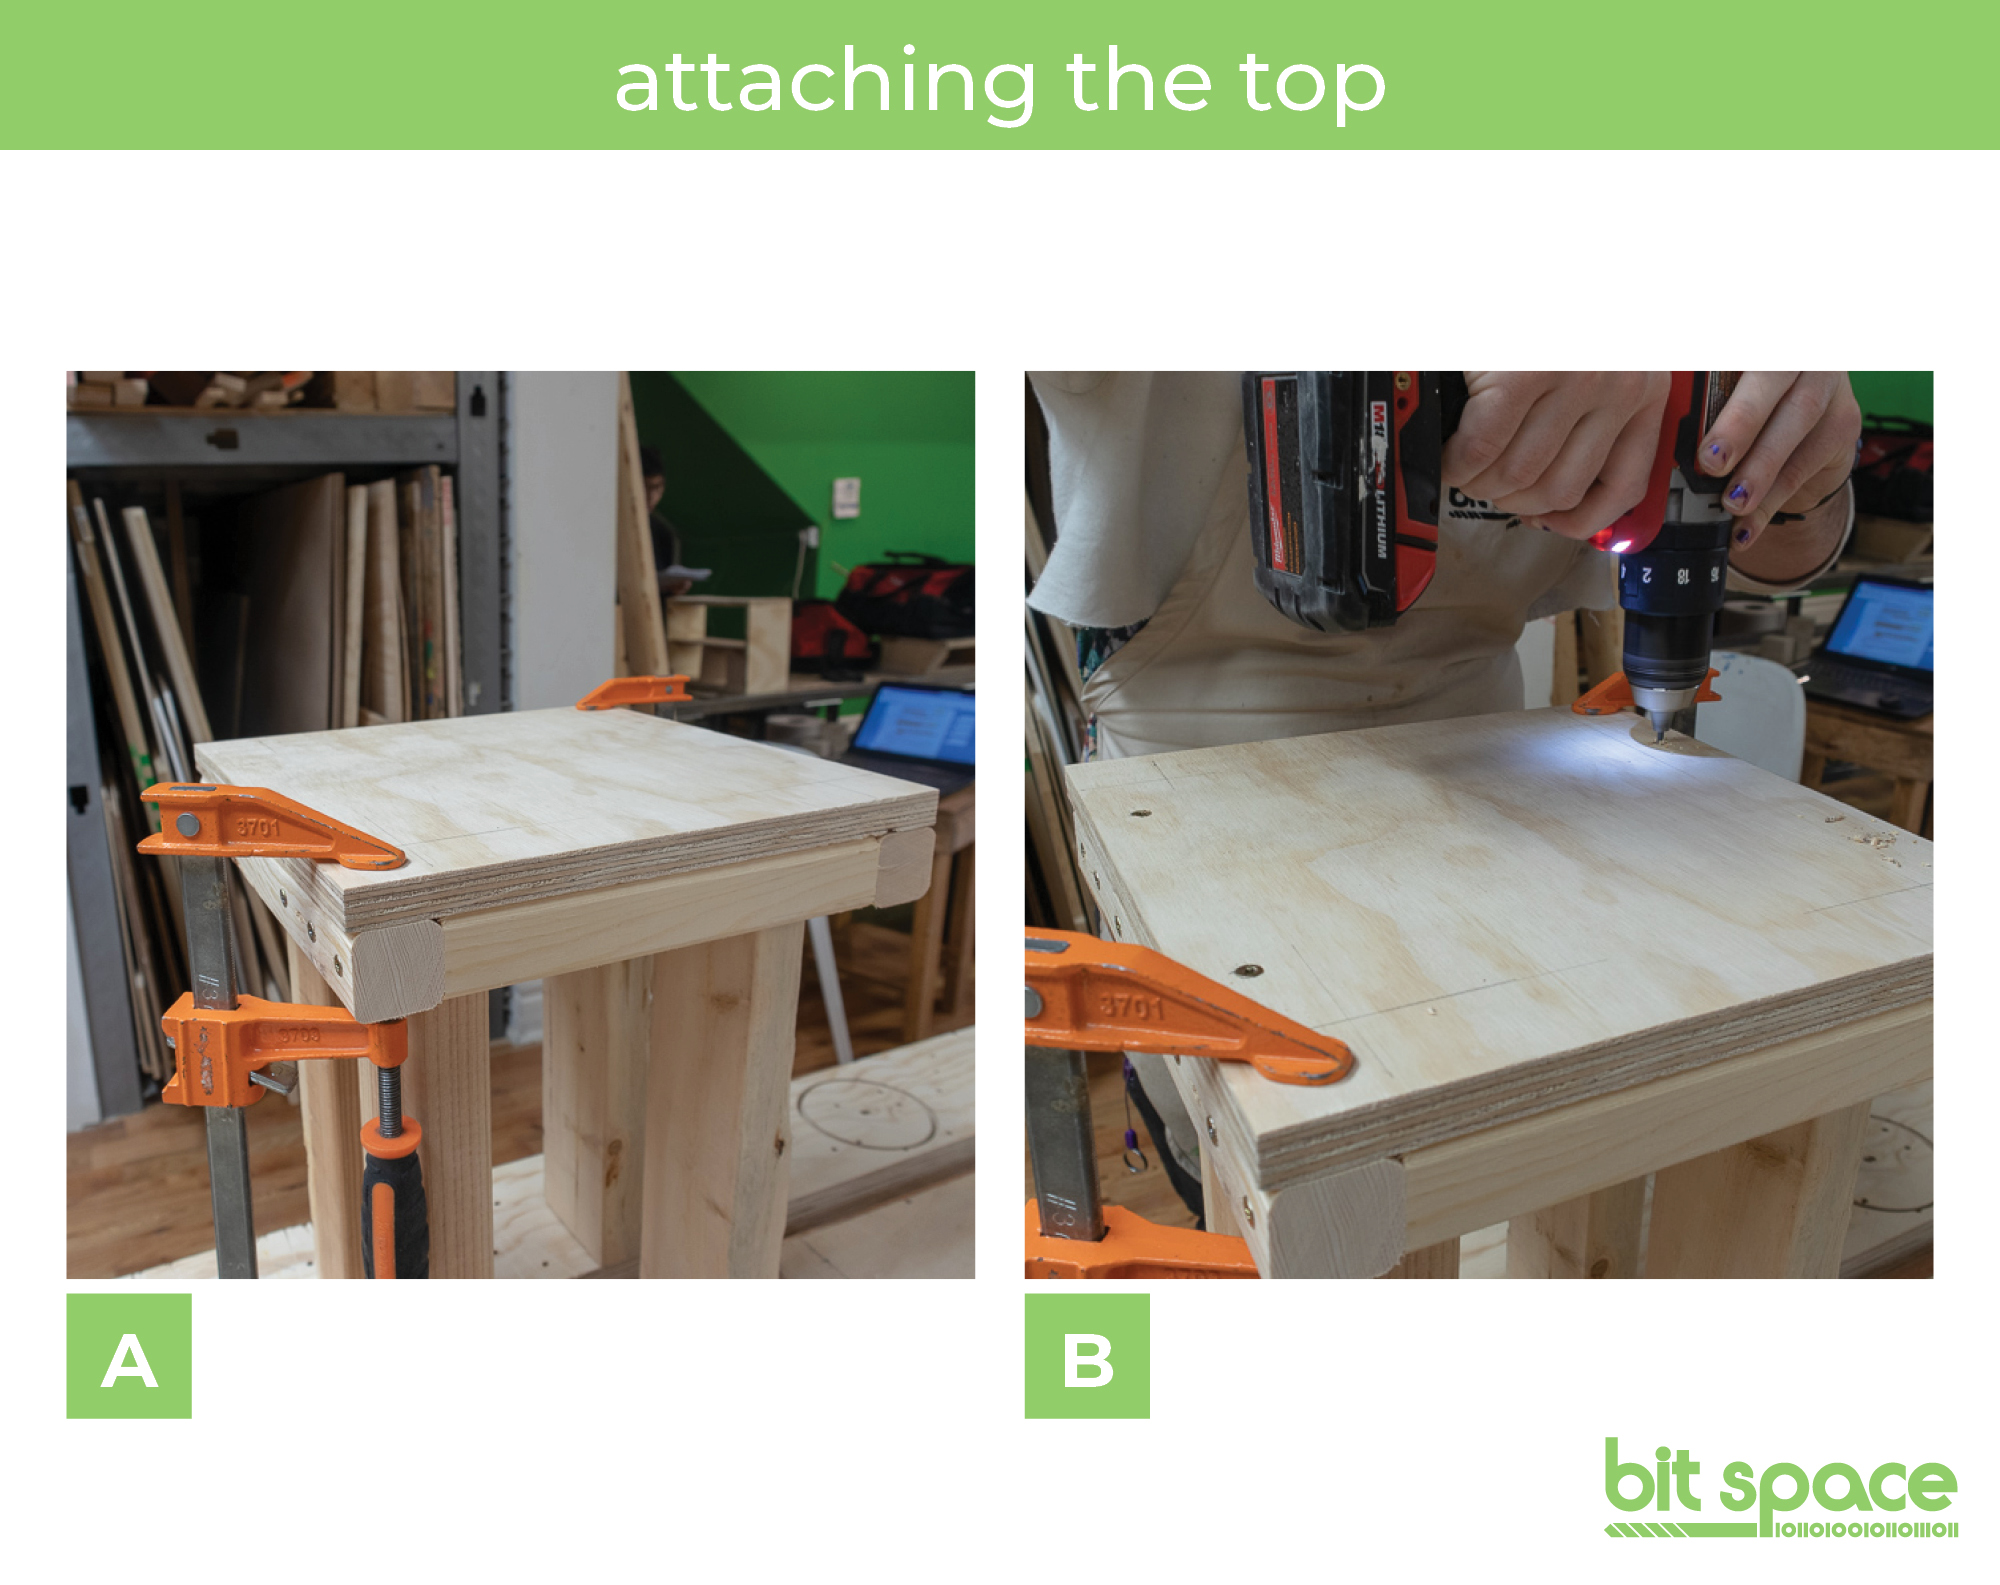
Your table is complete.